

Custom car wraps are an exciting and budget-friendly way to transform your vehicle’s appearance without the permanence of a paint job. They’re ideal for beginners, offering a cost-effective, versatile solution that also provides excellent protection for your car’s original paint. A high-quality wrap not only guards against scratches and fading but also ensures your car maintains a polished look for years to come.
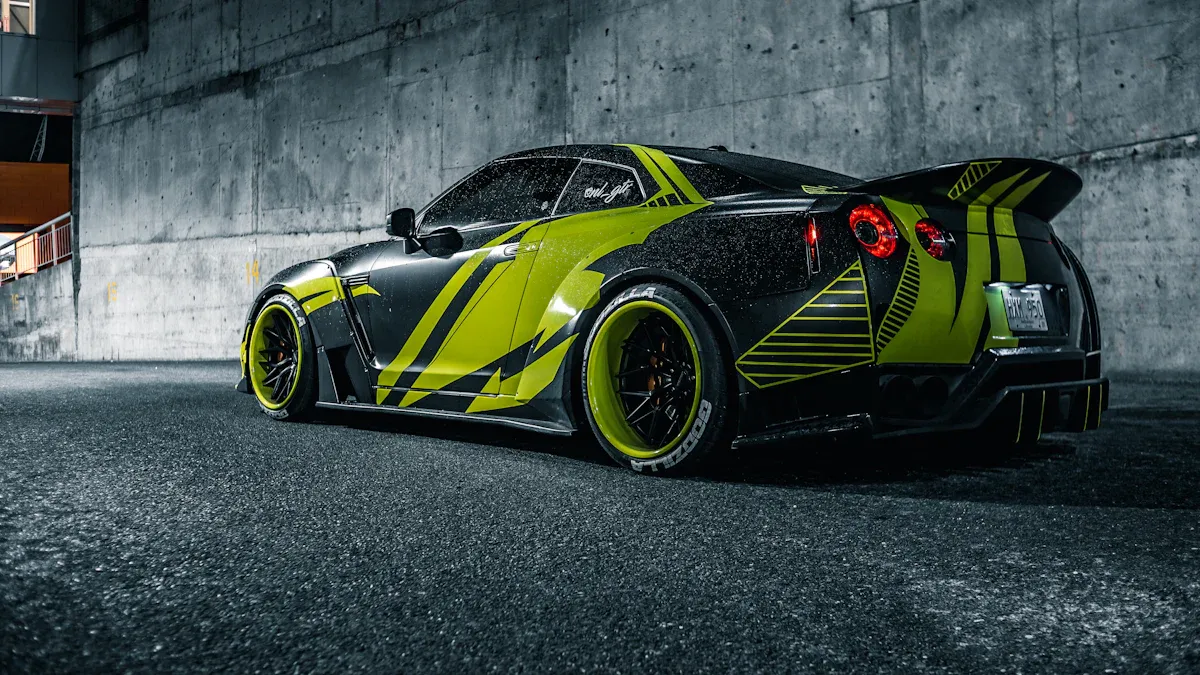
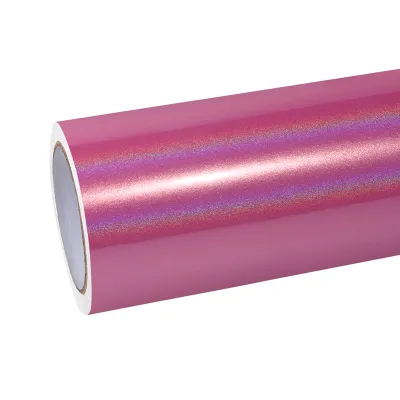
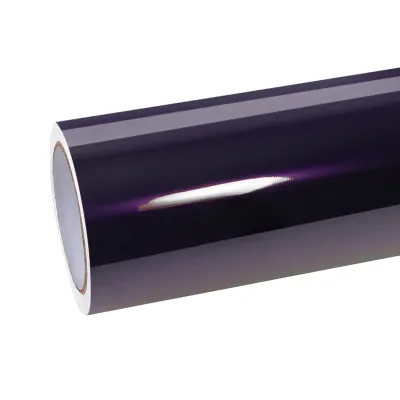
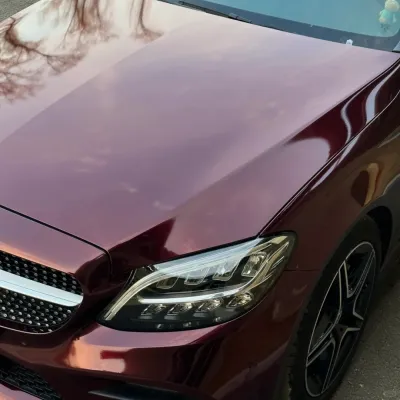
The beauty of custom car wraps lies in their limitless design possibilities. Whether you’re considering a vibrant pink car wrap or a sophisticated midnight purple wrap, you can showcase your personality and make a bold statement on the road. Pink car wraps, in particular, have gained popularity among celebrities and influencers for their eye-catching, luxurious appeal. If you’ve ever envisioned turning your car into a one-of-a-kind masterpiece, custom car wraps, like a stunning midnight purple wrap, can bring your vision to life.
Understanding Custom Car Wraps
What Are Custom Car Wraps
Custom car wraps are large sheets of vinyl that adhere to your vehicle’s surface, transforming its appearance without altering the original paint. These wraps come in various colors, finishes, and designs, allowing you to personalize your car to match your style. Whether you want a sleek matte black look or a vibrant holographic finish, vinyl wraps offer endless possibilities. They’re also removable, so you can switch up your car’s look whenever you want.
Benefits of Custom Car Wraps
Cost-effectiveness Compared to Paint Jobs
If you’ve ever looked into repainting your car, you know it can be pricey. The cost of wrapping a car is significantly lower, often ranging from $1,000 to $5,000, depending on the type of wrap and coverage. In contrast, a high-quality paint job can easily exceed $10,000. Vinyl wraps give you a budget-friendly way to achieve a professional, polished look.
Protection for Your Car’s Original Paint
Vinyl wraps act as a protective layer for your car’s paint. They shield the surface from scratches, UV rays, and minor abrasions. This means your car’s original paint stays intact, which can help maintain its resale value. Plus, if you live in an area with harsh weather, wraps can protect your car from environmental damage.
Endless Design Possibilities
Designing custom vehicle wraps lets you unleash your creativity. From bold patterns to subtle textures, the options are limitless. You can even choose popular trends like snow camo or iridescent wraps to make your car stand out. Whether you’re going for a classic look or something more adventurous, custom vehicle wraps allow you to express yourself.
Types of Car Wraps
Full Wraps vs Partial Wraps
When it comes to vehicle wrapping, you can choose between full wraps and partial wraps.
- Full Wraps: These cover the entire vehicle, offering a dramatic transformation. They’re perfect if you want a completely new look. However, they’re more expensive, with costs ranging from $2,500 to $5,000.
- Partial Wraps: These focus on specific areas, like the hood or doors. They’re more affordable, costing between $1,000 and $3,000, and still make a big impact.
Printed Wraps vs Solid Color Wraps
Printed wraps feature custom designs, logos, or patterns, making them ideal for branding or unique aesthetics. Solid color wraps, on the other hand, offer a sleek, uniform look. Both options are available in various finishes, such as matte, glossy, or satin.
Popular Options Like Pink Car Wrap and Midnight Purple Wrap
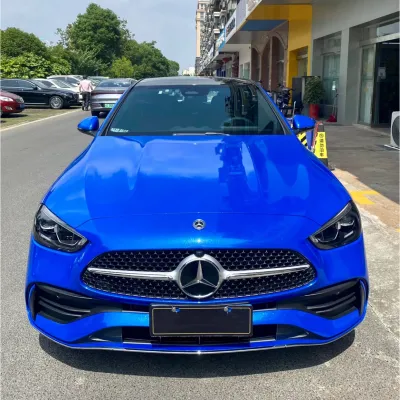
Some colors and designs are always in demand. Pink car wraps are trendy for their bold, luxurious vibe, while midnight purple wraps exude sophistication. Other popular choices include matte finishes, pearl textures, and holographic wraps.
Pro Tip: If you’re unsure which type of wrap to choose, consider your budget and the statement you want your car to make.
Choosing the Right Materials
Types of Vinyl
Cast Vinyl vs Calendered Vinyl
When it comes to vinyl wrapping, choosing the right type of car wrap material is crucial. You’ll often hear about two main types: cast vinyl and calendered vinyl. So, what’s the difference?
- Cast Vinyl: This is the premium option. It’s highly durable, lasting over seven years outdoors, and works well on complex surfaces like curves and edges. If you’re planning a long-term wrap or intricate designs, cast vinyl is your best bet.
- Calendered Vinyl: This is a more budget-friendly choice. It typically lasts 3-6 years and is better suited for flat surfaces. However, it’s less durable and may wear out faster in harsh conditions.
If you want a high-quality vinyl that stands the test of time, cast vinyl is worth the investment. But if you’re looking for a short-term solution, calendered vinyl can save you money.
Finishes to Consider
Glossy, Matte, Satin, and Textured Finishes
The finish you choose can completely change the look of your car wraps. Here’s a quick comparison to help you decide:
| Finish Type | Pros | Cons |
|---|---|---|
| Matte | 1. Unique Look: Creates a modern appearance. 2. Hides Imperfections: Less noticeable scratches. 3. Low Glare: Reduces glare in sunlight. | 1. High Maintenance: Shows dirt easily. 2. Limited Color Options: Fewer choices than gloss. 3. Cost: More expensive due to specialized appearance. |
| Satin | 1. Versatility: Combines elegance and vibrancy. 2. Easier Maintenance: Simpler to clean. 3. Enhanced Depth: Adds dimension to contours. | 1. Limited Availability: Less common than other finishes. 2. Moderate Cost: Similar pricing to matte. |
| Gloss | 1. Wide Color Range: Extensive selection available. 2. Classic Appeal: Timeless high-shine finish. 3. Easy Maintenance: Dirt less visible. | 1. Reveals Imperfections: Scratches more noticeable. 2. High Glare: Can produce glare in sunlight. |
Each finish has its own vibe. Matte gives a sleek, modern look, while gloss offers a classic shine. Satin strikes a balance between the two, and textured finishes like carbon fiber add a unique touch.
Factors to Keep in Mind
Durability and Lifespan
The durability of car wrap materials depends on the type of vinyl and the conditions it faces. Cast vinyl lasts longer and handles wear and tear better than calendered vinyl. If you live in an area with extreme weather, investing in high-quality vinyl ensures your wrap stays intact for years.
Climate and Environmental Considerations
Climate plays a big role in the lifespan of vinyl wrapping. High temperatures and UV exposure can cause the vinyl to crack or peel, while cold weather makes it brittle. To protect your wrap:
- Wash your car regularly to remove pollutants.
- Use wrap-safe wax to shield against UV rays.
- Park in shaded areas or use a car cover when possible.
Budget Constraints
Your budget will influence your choice of car wrap material and finish. Cast vinyl costs more upfront but lasts longer, making it a cost-effective option in the long run. Calendered vinyl is cheaper but may require replacement sooner. Consider how much you’re willing to spend and how long you want the wrap to last.
Pro Tip: If you’re unsure, start with a partial wrap or a less expensive finish to test the waters before committing to a full wrap.
Essential Tools and Preparation
Getting ready for a car wrapping project involves more than just picking out a vinyl design. You’ll need the right tools, a clean vehicle, and a proper workspace to ensure a smooth and professional-looking finish. Let’s break it down step by step.
Tools You’ll Need
To get started, gather these essential tools for your DIY car wrapping project:
- Vinyl Wrap – The star of the show! Choose a high-quality wrap that suits your design and durability needs.
- Cutting Tools – Precision is key. Use sharp blades or knives to trim the vinyl accurately.
- Squeegee – This helps smooth out the vinyl and remove air bubbles.
- Heat Gun or Torch – A heat gun softens the vinyl, making it easier to stretch and conform to curves.
- Surface Preparation Tools – Include cleaning supplies like microfiber towels and degreasers.
- Gloves and Mask – Protect your hands and avoid fingerprints on the vinyl.
- Measuring Tape and Level – These ensure accurate measurements and alignment.
- Adequate Lighting – Bright lighting helps you spot imperfections during the application process.
Having these tools on hand will make your car wrapping experience much smoother and more efficient.
Preparing Your Vehicle
Proper cleaning and surface preparation are crucial for a flawless wrap. Here’s how to do it:
- Wash your car thoroughly using car wash soap and microfiber towels to remove dirt and contaminants.
- Apply a degreasing agent to eliminate grease, wax, and old sealants.
- Use an alcohol-based solution to clean the surface and ensure no residue remains.
- Pay extra attention to cracks, corners, and hard-to-reach areas. These spots can affect adhesion.
- Remove hardware like emblems, badges, and trims to clean hidden areas and create a smooth surface.
Tip: Always inspect your car for surface imperfections like scratches or dents. Address these issues before wrapping to avoid bumps or uneven finishes.
Creating a Workspace
Your workspace plays a big role in the success of your car wrapping project. Here’s what to consider:
- Cleanliness: Sweep, vacuum, and mop the area to remove dust and debris. A clean environment prevents particles from sticking to the vinyl.
- Lighting: Bright, even lighting helps you see every detail during the wrapping process.
- Space: Make sure you have enough room to move around the car comfortably.
- Ventilation: Proper airflow keeps the workspace safe, especially when using cleaning agents or heat guns.
Pro Tip: If you don’t have a garage, consider renting a workshop or using a carport to create a controlled environment.
By preparing your tools, vehicle, and workspace, you’ll set yourself up for a successful car wrapping experience. With the right preparation, your car wraps will look professional and last longer.
Step-by-Step Guide to DIY Car Wrapping

Measuring and Cutting the Vinyl
Before you start applying the vinyl, accurate measurements are essential. Begin by measuring each section of your car that you plan to wrap. Use a measuring tape to determine the dimensions of the hood, doors, roof, and other areas. Add a few extra inches to your measurements to account for errors or adjustments during application.
Once you’ve measured, roll out the vinyl on a clean, flat surface. Use a sharp cutting tool to cut the vinyl according to your measurements. Make sure your cuts are precise to avoid wasting material. If you’re working with a patterned or printed wrap, align the design carefully before cutting to ensure it looks seamless when applied.
Tip: Always double-check your measurements before cutting. It’s better to have a little extra vinyl than to run short during the process.
Applying the Wrap
Positioning the Vinyl
Start by positioning the vinyl on the car’s surface. Use masking tape to temporarily hold it in place. This allows you to adjust the alignment and ensure the wrap fits perfectly. Once you’re satisfied with the placement, peel back a small section of the backing paper to expose the adhesive.
Slowly stick the exposed vinyl onto the car, keeping it taut to avoid wrinkles. Work in small sections, peeling back the backing as you go. This method gives you better control and reduces the chances of misalignment.
Using Heat to Stretch and Conform
Vinyl wraps are flexible, but heat makes them even more pliable. Use a heat gun to warm the vinyl, especially around curves and edges. This helps the material stretch and conform to the car’s contours. Hold the heat gun a few inches away from the vinyl to avoid overheating or damaging it.
As you apply heat, use a squeegee to press the vinyl onto the surface. Start from the center and work outward to remove air bubbles and wrinkles. High-quality vinyl makes this process smoother and ensures a professional finish.
Pro Tip: Keep the heat gun moving to prevent burning the vinyl. Practice on a small section first to get the hang of it.
Trimming and Finishing
Cutting Excess Vinyl
Once the vinyl is applied, it’s time to trim the excess material. Use a sharp blade to cut along the edges of the panels. Hold the blade at a slight angle to achieve clean, precise cuts. Be careful not to cut too close to the car’s surface to avoid damaging the paint.
Sealing Edges for Durability
To ensure your wrap lasts, seal the edges properly. Use a heat gun to warm the edges and press them down firmly with a squeegee or your fingers. This step prevents the vinyl from peeling over time. For added durability, consider applying an edge sealer or adhesive promoter.
Note: Sealing the edges not only improves the wrap’s longevity but also gives it a polished, professional look.
By following these step-by-step instructions, you can achieve a flawless DIY car wrapping job. Take your time, use the right tools, and practice these installation techniques to perfect your skills. With patience and attention to detail, your car wraps will look like they were done by a pro.
Troubleshooting Common Issues
Even with careful preparation, you might run into a few hiccups during your car wrapping project. Don’t worry—these common issues are easy to fix with the right techniques. Let’s tackle two of the most frequent problems: air bubbles and misalignment.
Air Bubbles and Wrinkles
Air bubbles and wrinkles can pop up when the vinyl isn’t applied smoothly. They’re frustrating, but you can handle them like a pro. Here’s how:
- Use Heat and Pressure: Grab a heat gun and gently warm the area with bubbles or wrinkles. The heat softens the vinyl, making it easier to smooth out. Use a squeegee to press the vinyl down, working from the center outward.
- Make Relief Cuts: For larger bubbles, use a sharp blade to make a tiny cut. This releases the trapped air. Then, apply heat and smooth the area with your squeegee.
- Prevent Future Issues: Always clean your car thoroughly before starting. Dirt or grease can cause poor adhesion, leading to bubbles.
Tip: Work slowly and methodically. Rushing increases the chances of air bubbles forming.
Misalignment and Repositioning
Sometimes, the vinyl doesn’t line up perfectly on the first try. That’s okay—vinyl wraps are forgiving. Here’s what you can do:
- Peel and Reposition: If you notice misalignment, gently peel back the vinyl. Reposition it carefully, ensuring it aligns with the edges or design pattern.
- Apply Proper Tension: Keep the vinyl taut as you reapply it. This prevents wrinkles and ensures a smooth finish.
- Use Heat for Adjustments: A little heat can make the vinyl more flexible, helping you stretch it into place.
Pro Tip: Always double-check alignment before sticking the vinyl down completely. It’s easier to fix early on than after the adhesive sets.
By addressing these issues as they arise, you’ll achieve a flawless finish. Remember, practice makes perfect, and even professionals started as beginners. With patience and the right techniques, your car wraps will look amazing.
Maintenance and Care Tips for Vinyl Wrapping
Taking care of your vinyl wrap ensures it stays vibrant and lasts longer. With the right cleaning methods and protective measures, you can maintain the long-lasting power of car wraps and keep your vehicle looking fresh.
Cleaning Your Wrapped Car
Best Cleaning Products to Use
When cleaning your wrapped car, choosing the right products is essential. Harsh chemicals can damage the vinyl, so stick to these options:
- Use a pH-neutral or wrap-safe car shampoo to gently clean the surface without harming the wrap.
- A detailing spray designed for vinyl wraps adds shine and an extra layer of protection.
- For tougher grime, try an all-in-one cleaner that’s safe for car wraps.
Tip: Always test a new product on a small, hidden area before applying it to the entire wrap.
Avoiding Abrasive Materials
Avoid using abrasive tools or materials that can scratch the wrap. Instead:
- Stick to microfiber towels or soft sponges for washing and drying.
- Never use brushes with stiff bristles or rough scrubbing pads.
- Skip automatic car washes with rotating brushes, as they can peel or damage the wrap.
Protecting the Wrap
Parking in Shaded Areas
Direct sunlight can fade the colors and weaken the adhesive over time. Whenever possible, park your car in shaded areas or use a car cover. This simple step helps preserve the vibrancy and integrity of your wrap.
Using Protective Coatings
Applying a protective coating, like paint protection film (PPF), can extend the lifespan of your wrap. Here’s how it helps:
- Absorbs impacts from debris, reducing scratches and chips.
- Shields against UV rays and environmental contaminants, keeping colors vibrant.
- Maintains the desired finish, whether it’s gloss or matte.
- Simplifies cleaning by making the surface stain-resistant.
Pro Tip: Consider adding a protective coating right after installation to maximize the benefits.
When to Replace or Repair the Wrap
Signs of Wear and Tear
Over time, even the best-maintained wraps may show signs of aging. Watch out for:
- Fading colors or discoloration, especially in areas exposed to sunlight.
- Bubbling or air pockets that prevent proper adhesion.
- Peeling edges, which can compromise the wrap’s appearance and durability.
DIY Patching vs Professional Repair
If the damage is minor, like a small tear or bubble, you can attempt a DIY patch using leftover vinyl. However, for extensive wear or peeling, it’s best to consult a professional. They can assess the damage and recommend whether a repair or full replacement is necessary.
Note: Regular inspections can help you catch issues early, saving you time and money in the long run.
By following these application and maintenance tips, you’ll enjoy the long-lasting power of car wraps. Proper car wrap maintenance not only keeps your vehicle looking great but also protects your investment.
DIY vs Professional Installation
Pros and Cons of DIY Car Wrapping
Cost Savings
DIY car wrapping can save you a significant amount of money upfront. Materials for a DIY project typically cost between $500 and $1,500, with tools adding another $100 to $300. Compared to professional installation fees, which range from $1,500 to $5,000 or more, the savings are clear. If you’re on a tight budget, this option might seem appealing.
However, keep in mind that cheaper doesn’t always mean better. DIY wraps may lack the durability and polished finish of a professional job. Mistakes can lead to wasted materials, which could increase your overall costs.
Learning Curve and Potential Mistakes
Wrapping your car yourself can be a rewarding experience, but it comes with challenges. Common mistakes include using low-quality vinyl, poor surface preparation, and improper heat application. For example, stretching the vinyl too much or applying it in cold weather can ruin the material. Using the wrong tools or skipping adhesive promoters in high-stress areas can also cause issues.
If you’re new to car wrapping, expect a learning curve. You’ll need patience and practice to achieve a professional-looking result. While it’s a great way to learn a new skill, be prepared for potential setbacks along the way.
Benefits of Professional Installation
Expertise and Precision
Professional installation ensures a flawless finish. Experts know how to handle complex curves, edges, and patterns, giving your car a seamless look. They also use high-quality materials, which enhance durability and longevity. If you want your car wraps to look perfect and last longer, hiring a professional is worth considering.
Warranty and Aftercare Services
Many professional installers offer warranties on their work. If issues like peeling or bubbling occur, you can return for repairs at no extra cost. This peace of mind isn’t available with DIY projects. Professionals also provide aftercare tips to help you maintain your wrap, ensuring it stays vibrant for years.
How to Decide What’s Best for You
Budget Considerations
Your budget plays a big role in deciding between DIY and professional installation. If you’re looking to save money, DIY might be the way to go. However, remember that professional services, while more expensive, often deliver better quality and durability.
Time and Skill Level
Think about how much time you can dedicate to the project and your skill level. DIY wrapping requires patience and practice, especially if you’re a beginner. If you’re short on time or unsure about your abilities, a professional installation might be the better choice.
Ultimately, the decision comes down to your priorities. Do you value cost savings over quality, or are you willing to invest in a professional finish? Consider your goals and resources to make the best choice for your car wrapping project.
Custom car wraps a fantastic way to give your car a fresh, personalized look without breaking the bank. They’re cost-effective, protect your car’s original paint, and can last up to five years with proper care. Whether you choose premium cast vinyl for durability or calendered vinyl for affordability, there’s an option for every budget. Plus, the endless design possibilities mean you can truly make your car your own, whether you go for a bold pink wrap or a sleek midnight purple finish.
If you’re ready to dive into car wrapping, start by researching your vehicle’s unique template and gathering the right materials. For beginners, a DIY approach can be a fun learning experience, but professional installation ensures a flawless finish. Either way, this is your chance to transform your car into a rolling work of art. So, why wait? Take the first step and let your creativity shine on the road!


0 Comments