

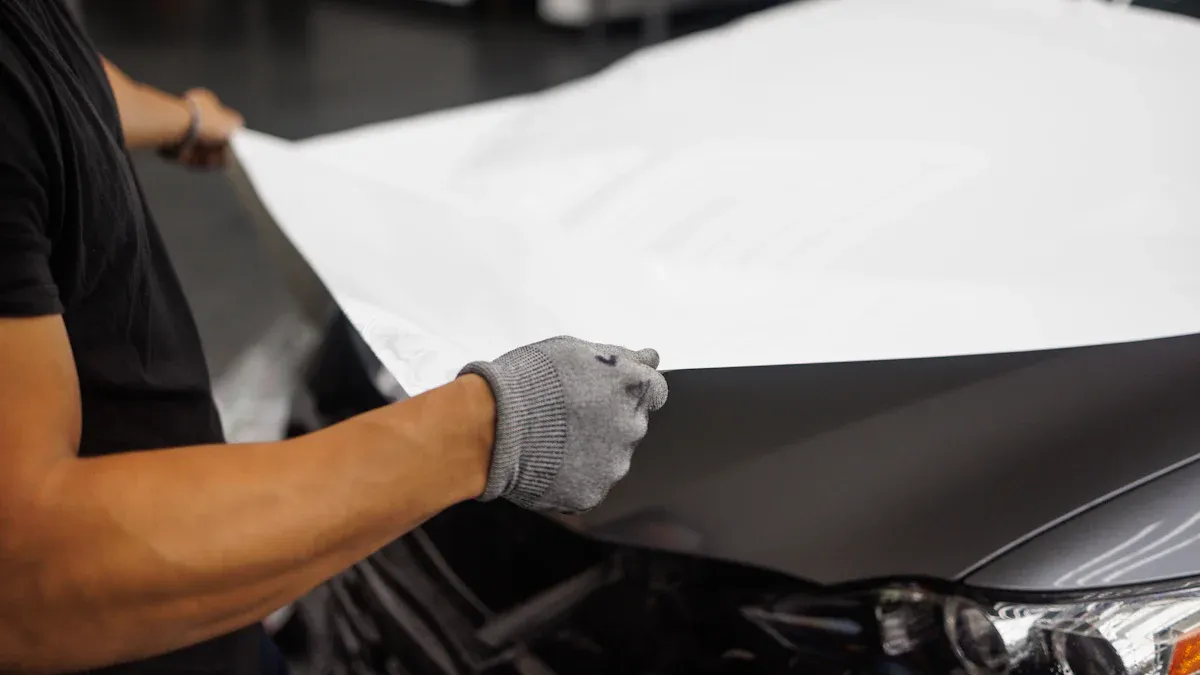
When you apply a car wrap, achieving a smooth finish is crucial. Bubbles can detract from its appearance and effectiveness. To prevent and eliminate them, you can use some simple techniques. For instance, a squeegee helps push bubbles to the edge, while the pinprick method allows you to release trapped air easily.
Getting Ready for Car Wrap Installation
Before you start putting on your car wrap, getting ready is very important. A clean surface helps the vinyl stick well. This gives you the perfect look you want.
Cleaning the Surface
First, wash your car the day before you install. This lets any water dry up. Use a gentle soap mix—just mix one teaspoon of dish soap with a quart of warm water. After washing, dry your car completely with a clean microfiber cloth. Even tiny dirt can make the adhesive fail, which can cause the wrap to lift.
Next, vacuum the surface to get rid of loose dirt, especially in cracks and seams. A soft brush can help with tough dirt. For the last cleaning, wipe the surface with isopropyl alcohol using a lint-free cloth. This step is very important because it removes oil or wax, helping your Ravoony car wrap stick better.
Picking the Right Tools
Having the right tools makes a big difference when you install. Here’s a quick list of must-have items you should collect:
- Squeegee: Helps push out air bubbles.
- Utility Knife: For cutting extra vinyl.
- Heat Gun: Helps stretch the vinyl around curves.
- Painter's Tape: Use it to cover areas you want to protect.
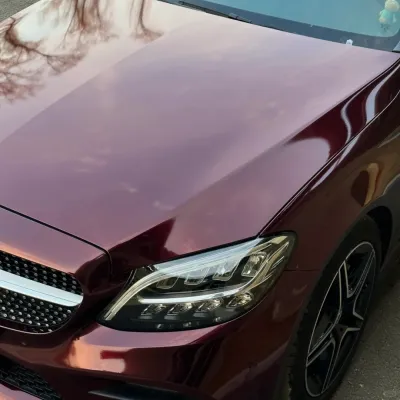
By getting your workspace ready and gathering these tools, you prepare for success. With the right steps, your glossy car wrap will look amazing, whether you pick the Best Ravoony Gloss Metallic Vampire Red Car Vinyl Wrap or another choice.
When you apply a car wrap, achieving a smooth finish is crucial. Bubbles can detract from its appearance and effectiveness. To prevent and eliminate them, you can use some simple techniques. For instance, a squeegee helps push bubbles to the edge, while the pinprick method allows you to release trapped air easily.
Getting Ready for Car Wrap Installation
Before you start putting on your car wrap, like Best Ravoony Gloss Metallic Vampire Red Car Vinyl Wrap getting ready is very important. A clean surface helps the vinyl stick well. This gives you the perfect look you want.
Cleaning the Surface
First, wash your car the day before you install. This lets any water dry up. Use a gentle soap mix—just mix one teaspoon of dish soap with a quart of warm water. After washing, dry your car completely with a clean microfiber cloth. Even tiny dirt can make the adhesive fail, which can cause the wrap to lift.
Next, vacuum the surface to get rid of loose dirt, especially in cracks and seams. A soft brush can help with tough dirt. For the last cleaning, wipe the surface with isopropyl alcohol using a lint-free cloth. This step is very important because it removes oil or wax, helping your Ravoony car wrap stick better.
Picking the Right Tools
Having the right tools makes a big difference when you install. Here’s a quick list of must-have items you should collect:
- Squeegee: Helps push out air bubbles.
- Utility Knife: For cutting extra vinyl.
- Heat Gun: Helps stretch the vinyl around curves.
- Painter's Tape: Use it to cover areas you want to protect.
By getting your workspace ready and gathering these tools, you prepare for success. With the right steps, your shiny car wrap will look amazing, whether you pick the Best Ravoony Gloss Metallic Vampire Red Car Vinyl Wrap or another choice.
Ways to Get Rid of Bubbles
If you see bubbles in your car wrap, don’t panic! There are easy ways to fix them and make your wrap look great.
Using a Squeegee
First, use a squeegee. This tool helps smooth the vinyl and let air out. Hold the squeegee at an angle and press gently. This pushes the bubble to the edge so the air can escape. A squeegee with a soft edge is best because it won’t hurt the vinyl. It works best during installation before you seal the edges.
Using a Needle
For bubbles that won’t move, take a needle or pin. Carefully poke the bubble and smooth it with your finger or the squeegee. This lets the trapped air out without hurting the wrap. Just be careful not to make big holes; a small pinprick is all you need!
Using Heat with a Heat Gun
If you find wrinkles or bubbles, a heat gun can help. Heat makes the vinyl softer and easier to work with. As you heat the area, gently pull down on the vinyl to fix any bumps. This method helps remove bubbles and makes sure the wrap sticks better.
By using these methods, you can get a professional-looking car wrap that makes your vehicle shine.
Preventive Measures During Installation
When you put on your car wrap, the place matters a lot.
Working in the Right Environment
Try to work in a space with good temperature and humidity. The best temperature for putting on vinyl is between 70°F and 80°F (21°C-27°C). Keeping humidity around 50% helps stop problems like stretching or wrinkles. For example, if you use an air-conditioned garage in summer, you’ll keep the right conditions for better sticking and wrap quality.
Applying Vinyl Film Correctly
How you apply the vinyl can really help. First, clean the surface well to get rid of dirt and grease. You might want to use a clay bar to make it even cleaner. This gives you a smooth surface for better sticking. When you put on the vinyl, use the center-out method. This way, you spread tension evenly and push air to the edges, which helps avoid bubbles. Also, think about using high-quality cast vinyl films that fit curves well and have air release features to lower trapped air.
Taking Your Time
Hurrying through the installation can cause mistakes. Take your time to make sure everything is right. Cleaning the surface well and keeping good conditions helps the glue work better. High-quality vinyl that’s soft when warmed makes it easier to let out trapped air. Remember, being patient helps you get a perfect car wrap.
In summary, remember these key techniques: clean your surface, use a squeegee, and apply heat when needed. Don’t rush! Take your time to practice. With patience and the right methods, you’ll achieve that perfect, bubble-free finish on your Ravoony car wrap. Happy wrapping! 🚗✨


0 Comments